Benefits of Let’s Encrypt certificates are that they are automated, short lifetimes (90 days) and that they are completely FREE!
Prerequisites before starting
- A domain name of your own, such as mydomain.com.
- DDNS service configured. Use Synology DDNS or DDNS on your router.
- Create a CNAME DNS record with your (mydomain.com) registrar to forward requests to your DDNS service.
- Enable port forwarding of from your router for port 80 and 443 to your NAS.
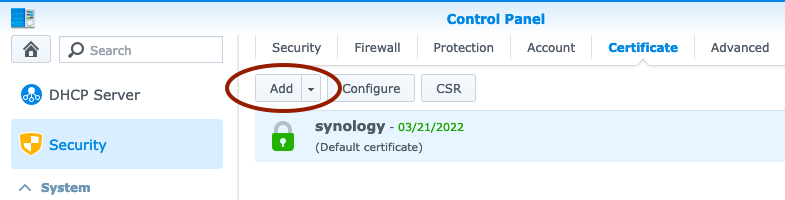
Creating Encrypt SSL certificate, login to DSM, navigate to Control panel > Security > Certificate and click on Add
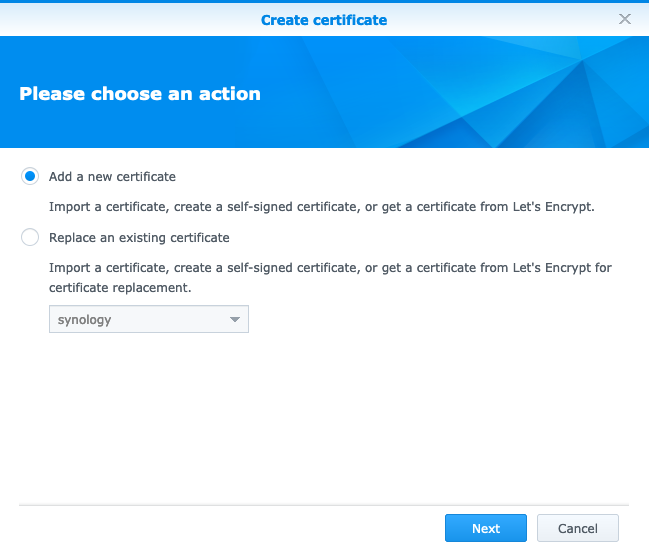
Select “Add a new certificate” or “Replace an existing certificate” to replace your existing or self-signed certificate.
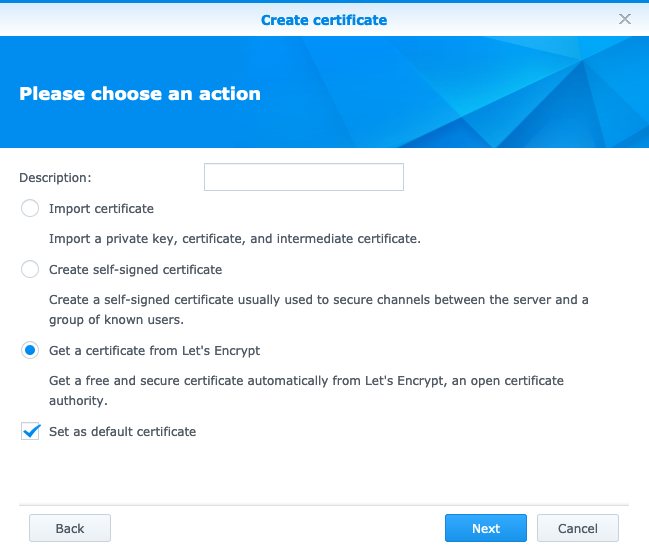
Select “Get a certificate from Let’s Encrypt” and check “Set as default certificate”
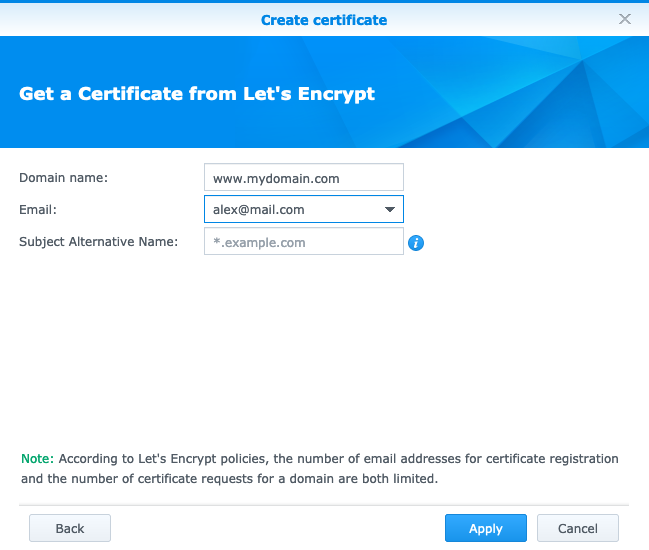
Enter a Domain Name and email address and click on Apply